Page 2 of 3
Posted: Tue Jun 17, 2008 11:41 pm
by kwackman12
Mine's got the R6 conversion with a cut air box, when i had it on the rolling road it produced 2 bhp more with the lid removed but the filter was retained & "wired" into place
Posted: Wed Jun 18, 2008 6:28 pm
by mgtkr1
elf, atm i have ''open'' carbs in conjuction with a heatsheild and a ''airbox'' type shroud as what appears to be on (i think) either the h***a rs pre ram air or the earlier tz v twins (again pre-ram air. i based mine on dean dicko's tz loosly.. the shroud i made is also very similar to HRC nsr type things. the best option is def ram i think. second best is to get as much cool air as you can to the intake area. i have used open carbs to good effect on my tuned yams but will soon be making a proper air box with a duct as mj, yourself, colin s and god knows how many others. the other advantage is you can run some kind of filtration which help preserve internals. when i make a mould for my airbox during winter, your welcome to sample one on the dyno elf. you can keep it as i will make a couple, one will go on my other bike aswell. id be intrested to see the gains next to a std size box. i will have to get my arse doen the dyno to try a few things. god, im so lazy!! elf, did you get chance to try the airbox ''we'' knocked up last year? or was it early this year?
Posted: Wed Jun 18, 2008 9:16 pm
by JanBros
my opinion on pressurised airboxes : little to no use on a KR.
read some articles on the subject, and they all come to the same conclusion : the big effect only starts above 200km/h, and even then, the gain in pressure ain't that much. and how many times a KR goes over 200km/h, even on a track

I don't think it's worth the effort.
If you just use it to get cold air into the carbs, I agree, but then I would save myself the trouble off fitting the carbs into the airbox to pressurize them to, just leed the cold air to the airbox and keep the box somewhat open so you don't have to pressurise the carbs.
but that's just mu opinion and never tested it. so Elf, seems like you'r a guy with a lot off patience and prepared to make some efforts : maybe you can do a test on the dyno
[-o<

Posted: Wed Jun 18, 2008 9:20 pm
by mr_bungholeo
only trouble with dyno's is they cant re-produce the effects of ram air on a rolling road...but any way of getting a cold charge in has to have some benefits...
Posted: Wed Jun 18, 2008 10:14 pm
by the kid
I have a cut airbox on my trackbike so the R6 shock fits and it runs well enough for my abilities on the track .
Still not convinced that the r6 raised ride height will work too well on the street , bit too high and the low speed steering is a bit wierd . Fine on the track tho and the extra ground clearance is most welcome .
Posted: Fri Jun 20, 2008 4:04 pm
by alanw
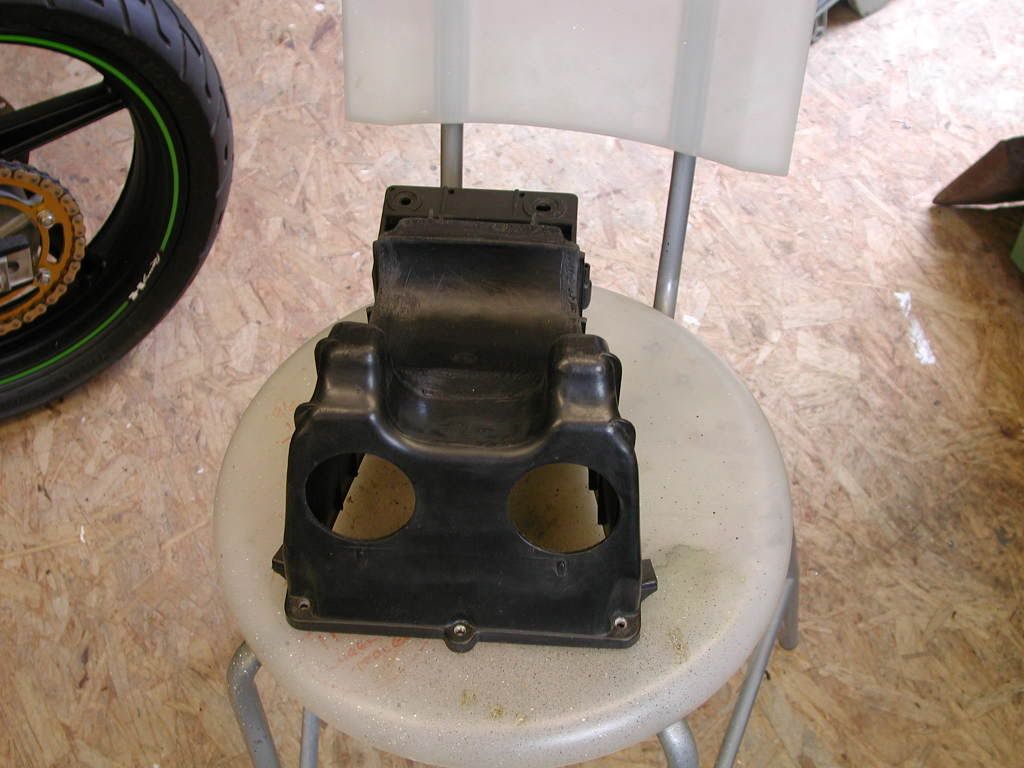
Could'nt find the will to make a new airbox. So took the dremmel to the old one, though it would be a pig but ends up wasn't that bad. Took a lot of time before I made a cut but I got lucky & was very close to what I wanted 1st time. Well chuffed, but would rather have had K&N's. Alan.
Photo bucket is playing silly b$ggers so new post for pics.

Posted: Fri Jun 20, 2008 4:34 pm
by alanw
I used an old mudguard inner heated & rolled around a pipe
Second time I've done plastic welding with soldering irons. still not fantastically pretty but it is strong & watertight.
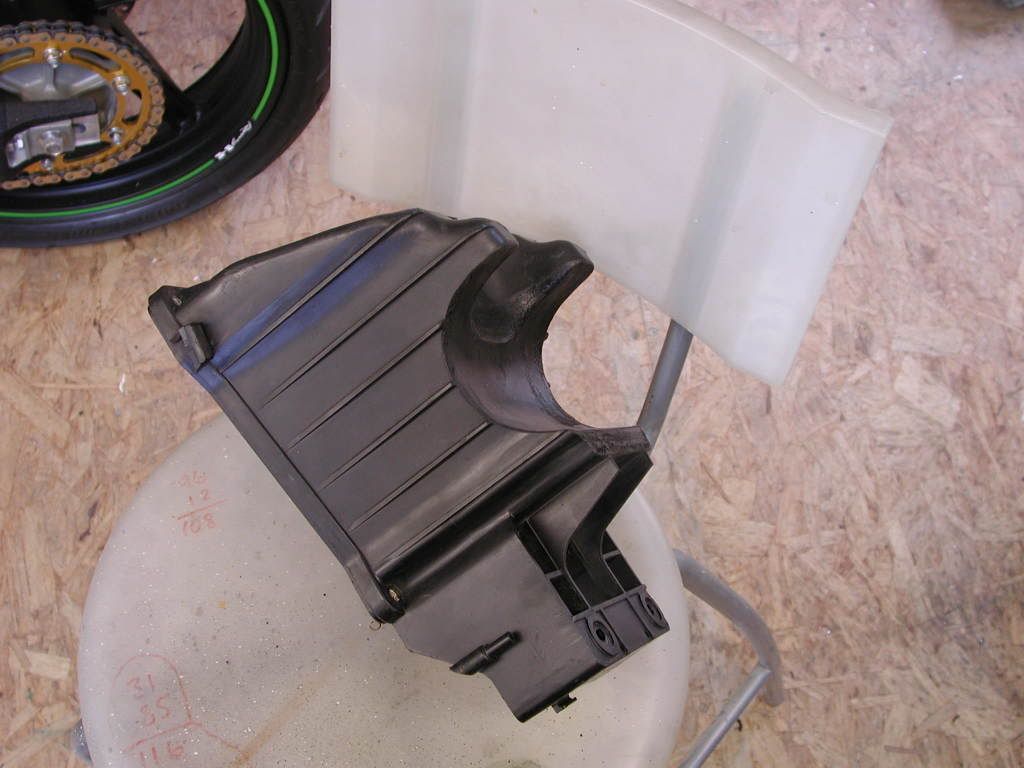
The curved piece takes up less room inside
I'll have to find out what these screws are for

never mind they look pretty

Posted: Fri Jun 20, 2008 6:23 pm
by mr_bungholeo
alan..old mate....would you be interested in making me one of those,its a top job =D>
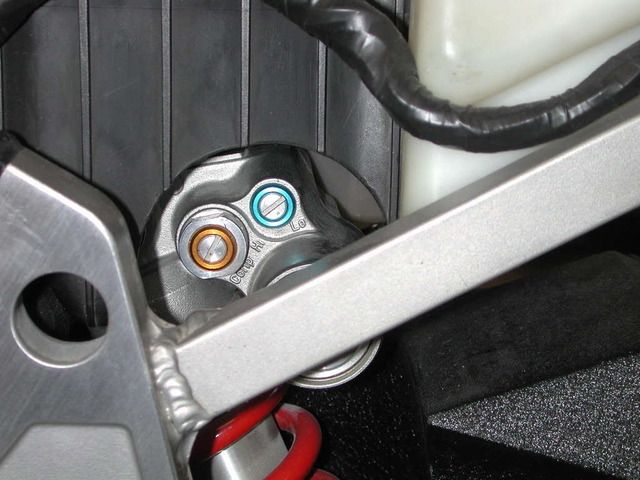
and the shiny things are high and low speed compression damping,when you plodding along the shock does'nt need to be as firm as its got time between bumps to get back ready for the next bump...but as you hit bumps in quicker succession,the shock needs to be stiffer or it wont return to deal with the next bump...it then hits another bump and sits a bit lower...then another bump and its lower still till it cant deal with hitting bumps anymore..its called pumpdown...
only trouble with turning em is you can make it worse...write down the stock settings,ride it,then adjust 1 screw at a time...try it,ajust a bit more,ride it...
im probably teaching you how to suck eggs...

Posted: Fri Jun 20, 2008 6:58 pm
by garye345
alan me old,thats cock on fella

how long did it take to make?you must have some right patience =D>
Posted: Fri Jun 20, 2008 8:40 pm
by scooble
wow, that is some job.
I did mine with GRP and plastic filler, and it looks a right bodge!
Hope to be building a fully enclosed one soon from plasticard. I think I might need to make the sub frame cross brace detachable though to get it in and out though

Posted: Fri Jun 20, 2008 8:59 pm
by mgtkr1
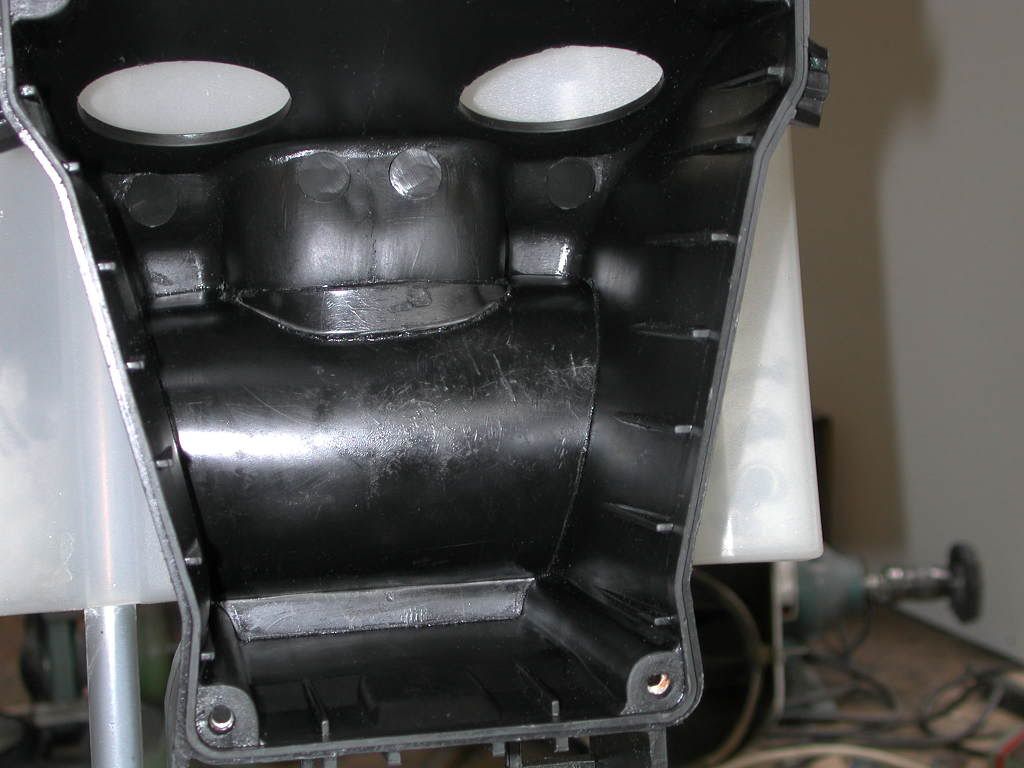
alan, what you mean it dont look pretty? its damn neat enough to me. esp like the fact you can get to the adjusters easily. id jet up, and try set it up to run with the lid absent. this will make up for the loss of volume. however you may find it will be as good with the lid or with the lid jacked at the front 25mm. dynos are good for comparisons like this. cracking job alan.
Posted: Fri Jun 20, 2008 9:34 pm
by SHimmer45
all form a Q for Alans Fabrication services =D>
Posted: Fri Jun 20, 2008 9:37 pm
by Red Devil 777
Superb Alan, I'm off to copy it asap

Have soldering iron will melt plastic
Posted: Sat Jun 21, 2008 12:18 am
by the kid
Mate what do you do for a job ?? Plastic surgeon by any chance
Great work =D>
Would you mind checking out my girlfriends boobs and see what you can do ?
Posted: Sat Jun 21, 2008 9:49 am
by alanw
Took from 4 till 11 one night, couple of hours the next night. Another one would be quicker. If anyone NEEDS ! one & CANT ! do it themselves. I'll try to do one or two, you would need to supply the airbox btm + an inner guard or suitable ABS. If too many want one then sorry can't do any
"time time time". I'll measure photo template any of it to help..... Using a soldering iron to plastic weld, I have 2 soldering irons, one very fine circuit iron which after experimenting I've found that if you push it well down between the joints of the plastic edges almost all the way through and almost joined together move along the joint doing that ( gives it strength ). Then I use a heavier iron to melt a thin strip of the same plastic over the top of the weld, but I press this one on the surface but make sure it melts into the two surfaces. then sand the rough back This isn't "how its done" this is how I do it... Alan.