start of c2 stripdown & rebuild
-
fred
- Oil Injector
- Posts: 926
- Joined: Sat Mar 22, 2008 5:42 pm
- Location: retford n,nott`s working in cotswolds
- Contact:
-
ScottaKR

- Premix Junkie
- Posts: 1521
- Joined: Fri Aug 10, 2007 2:52 pm
- Location: Australia
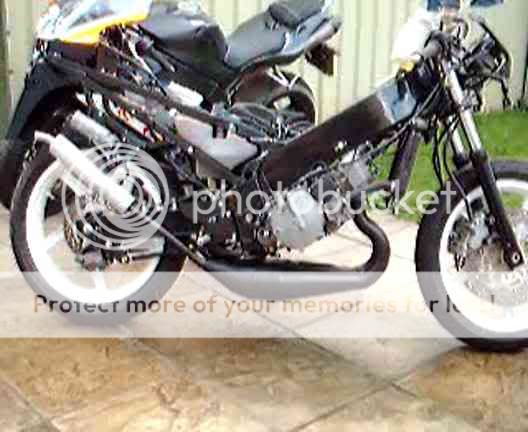
Flippin fantastic job there Fred. =D> =D> =D>
I'd personally go for the black paint option (and exhaust wrap if that's your thing), but it all comes down to what YOU prefer. I think taking 4"out of the cans might be a bit much (2" would be about as much as I'd trim them if at all), or you could just find some nice looking aftermarket cans or ones from an aprillia or other such bike.
I'd personally go for the black paint option (and exhaust wrap if that's your thing), but it all comes down to what YOU prefer. I think taking 4"out of the cans might be a bit much (2" would be about as much as I'd trim them if at all), or you could just find some nice looking aftermarket cans or ones from an aprillia or other such bike.
KR250 Tandem Twin (Naked) 
KR1 Red/White
KR1S Track Bike (has been put on hold for now)
ZXR750 H1 (Winter project)
KR1 Red/White
KR1S Track Bike (has been put on hold for now)
ZXR750 H1 (Winter project)

-
fred
- Oil Injector
- Posts: 926
- Joined: Sat Mar 22, 2008 5:42 pm
- Location: retford n,nott`s working in cotswolds
- Contact:
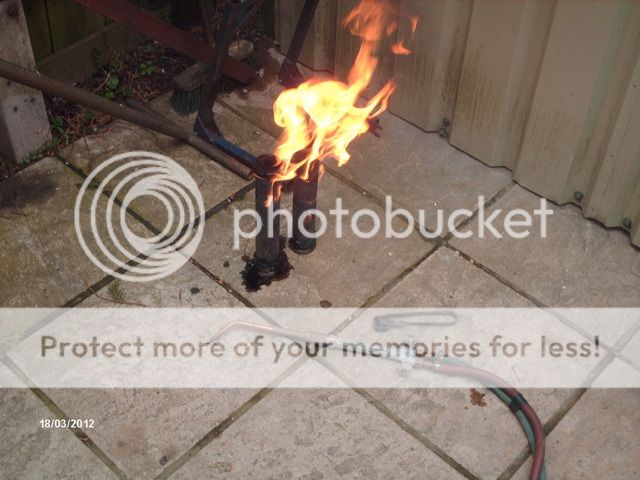
had a bad cold and am asthmatic so aint done much last week was nearly passing out coughing, but on the mend ,,gutted the silencers today,you only need to sand of the weld on the bolt flange then pull out ,get rid of the old packing,burn of the carbon,re wrap and reasemble then reweld ,make sure the 3 inner perf tubes are inline,1 of mine was bent and had started to burn the packing.

all welded ready to fit,Not going to shorten the cans just yet ,(it would be a easy job)callipers blasted ready,new clutch plates n springs to fit ,new battery to boot so should be on with the electrix later this week
all welded ready to fit,Not going to shorten the cans just yet ,(it would be a easy job)callipers blasted ready,new clutch plates n springs to fit ,new battery to boot so should be on with the electrix later this week
-
fred
- Oil Injector
- Posts: 926
- Joined: Sat Mar 22, 2008 5:42 pm
- Location: retford n,nott`s working in cotswolds
- Contact:
Shese a runner ,second kick ,0nly ran for 2 mins just now bcoz of the neighbours, need to look at tickover on left carb and dont know what air screws are set at,think i did em turn and a half out , the pipes sound great ,quite a bit louder than stock real crisp ,so last of electricks to do tommoz , then fibreglassing and undercoat ,ready to send off ,pics to come tommoro
if i remember rightly with pilot airscrew you tighten them, then undo them till it starts 4 stroking then tighten a bit till it stops ?
if i remember rightly with pilot airscrew you tighten them, then undo them till it starts 4 stroking then tighten a bit till it stops ?
-
JanBros

- Avgas Sniffer
- Posts: 3306
- Joined: Wed Jul 26, 2006 11:50 pm
- Location: the land of Francorchamps
that would be a good base-setup if the pilotscrew was at the front of the carb. turning out would then be making it richer.fred wrote: if i remember rightly with pilot airscrew you tighten them, then undo them till it starts 4 stroking then tighten a bit till it stops ?
however, on the PWK's, the pilotscrew only regulates air, so the more you turn it out, the leaner it becomes. you could spent all day turning it out and waiting for it to "4stroke" but it never will
just turn it about 3/4 out from full in
My ultimate goal is to die young as late as possible !
-
fred
- Oil Injector
- Posts: 926
- Joined: Sat Mar 22, 2008 5:42 pm
- Location: retford n,nott`s working in cotswolds
- Contact:
-
fred
- Oil Injector
- Posts: 926
- Joined: Sat Mar 22, 2008 5:42 pm
- Location: retford n,nott`s working in cotswolds
- Contact:
bit more progress ,washed dust off after sorting the weeping float bowl,then guess what  the right carb kept flooding ,stripped again,found nothing ,back on and fine,i resisted the screwdriver and tapomiter teqniqe to vibrate it abit,it`s just a little quirk of these anyway


if anyone wants a ssteel 18mm fine nut for the stem ive got one going free ,i just wanted to change the style
to say it cost about 4 or 5 hundred to get this far ,as soon as i get £300 saved i know wher its going ,
if anyone wants a ssteel 18mm fine nut for the stem ive got one going free ,i just wanted to change the style
to say it cost about 4 or 5 hundred to get this far ,as soon as i get £300 saved i know wher its going ,
-
fred
- Oil Injector
- Posts: 926
- Joined: Sat Mar 22, 2008 5:42 pm
- Location: retford n,nott`s working in cotswolds
- Contact:
-
fred
- Oil Injector
- Posts: 926
- Joined: Sat Mar 22, 2008 5:42 pm
- Location: retford n,nott`s working in cotswolds
- Contact:
-
fred
- Oil Injector
- Posts: 926
- Joined: Sat Mar 22, 2008 5:42 pm
- Location: retford n,nott`s working in cotswolds
- Contact:
chucked it in for a mot last friday thinking ile make prescott ,failed on ,lockstop right (all original but will build up with weld) 2 lower shock lincage bolts want swapping over ,no parking light in front headlight ,no rebound damping in rear shock, anyway stripped motor yesterday and crank is in the post to james ,center bearings slide and it was sucking gearbox oil ,i was just trying to kid myself ,but the plan is while the cranks away the mig ally n rotory files will play ,waiting on a paint code from these guys to get my tank painted.
http://www.ebay.co.uk/itm/251040126783? ... 1497.l2649
did a oil change on my original rear shock (read instructions to the letter) so i can take the first attemt off and refit the gooden ,a month or so and well be smileing ,i recon it would of been perfect for prescott with differt cogs
http://www.ebay.co.uk/itm/251040126783? ... 1497.l2649
did a oil change on my original rear shock (read instructions to the letter) so i can take the first attemt off and refit the gooden ,a month or so and well be smileing ,i recon it would of been perfect for prescott with differt cogs
-
fred
- Oil Injector
- Posts: 926
- Joined: Sat Mar 22, 2008 5:42 pm
- Location: retford n,nott`s working in cotswolds
- Contact:
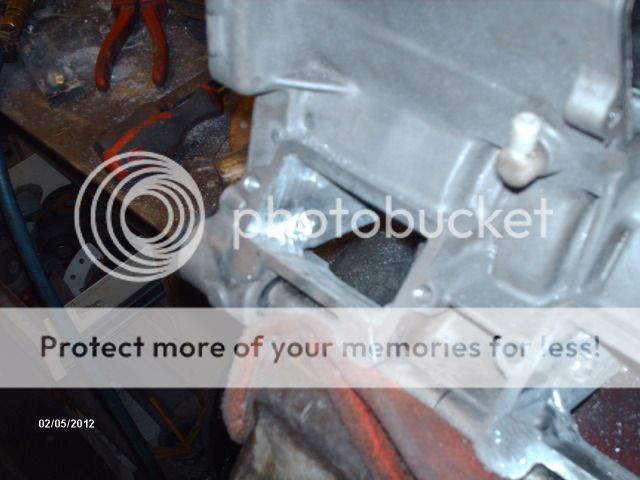
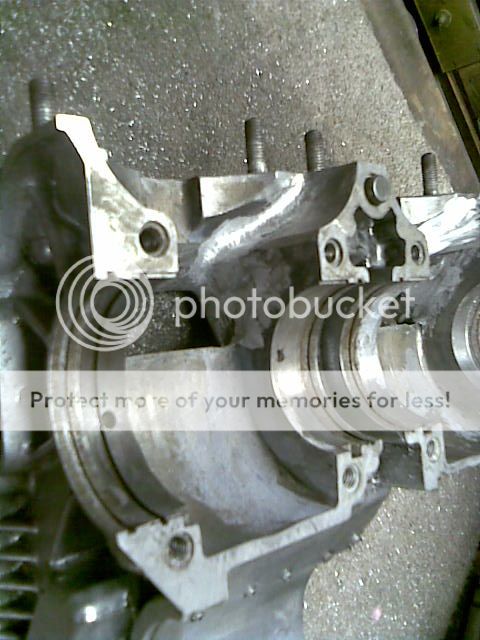
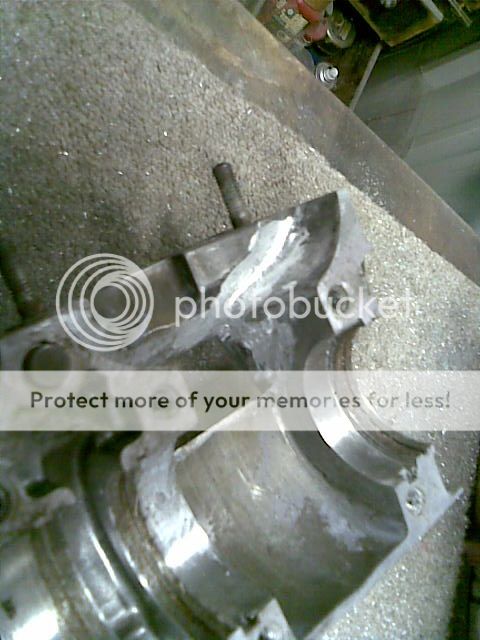
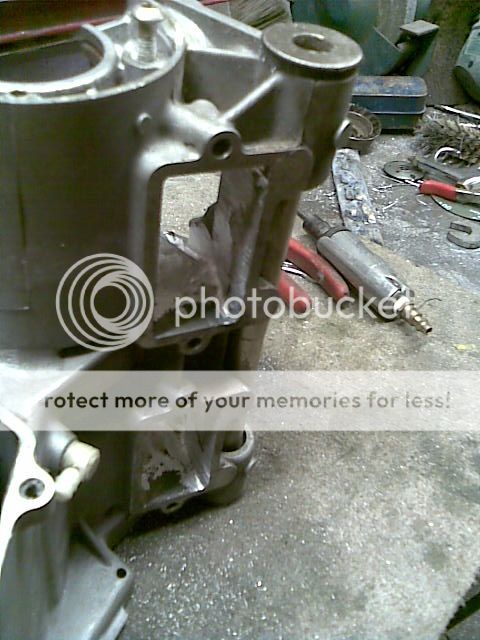
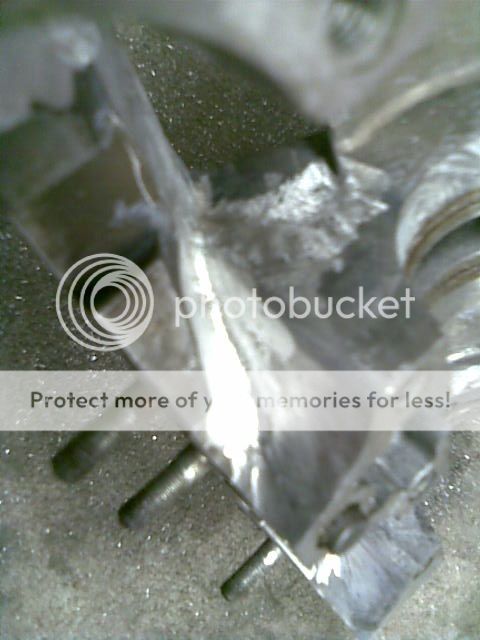
mig ally welding
welded up the receses in the inlets and laid a weld arouns the steps on the inside on the left n right of the inlet and the small pocket just infront of this (i think this is where the casting cores come together ,started fettling this evening and checked nothings moved. it did`nt even get hot enough to burn the engine mounts that i forgot to remove  good temprature indicator tho ,i dont want to remove too much but wanted to add some ,any recomendations would be greatly recieved
-
fred
- Oil Injector
- Posts: 926
- Joined: Sat Mar 22, 2008 5:42 pm
- Location: retford n,nott`s working in cotswolds
- Contact:
-
JanBros
- Avgas Sniffer
- Posts: 3306
- Joined: Wed Jul 26, 2006 11:50 pm
- Location: the land of Francorchamps
there's a lot more that you can grind away 
viewtopic.php?t=7457&start=0
viewtopic.php?t=1418&postdays=0&postord ... A&start=15
viewtopic.php?t=7457&start=0
viewtopic.php?t=1418&postdays=0&postord ... A&start=15
My ultimate goal is to die young as late as possible !
-
fred
- Oil Injector
- Posts: 926
- Joined: Sat Mar 22, 2008 5:42 pm
- Location: retford n,nott`s working in cotswolds
- Contact: