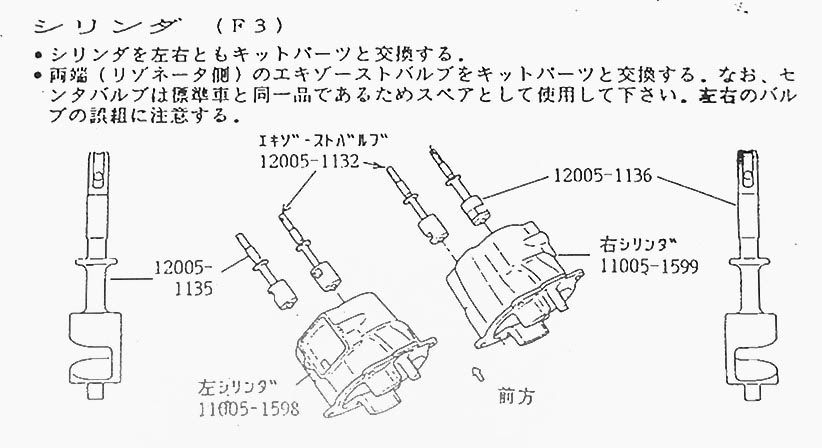
Just been busy trying to find out how, but with the standard links, it seems impossible. Since in one cylinder both valves turn the same way, using F3 valves in this setup will mean that one will close the boostport, but the other will not. with the regular valves this isn't a problem.
One solution is to use 2 different valves in one cylindre, so that both ports are properly closed, but that means that in the open position, one bridge is pointing to the inside of the exhaust port, but then that valves acts like a normal valve - and what's more : it's even worse because on the outside, the brigde is missing and so you don't have a smooth passage, but gasses are disrupted because off the cylindrical hole the KIPS sit in.
So how do you guys do this ? just stick them in without thinking ?
Seems like Maccas also thought it through, and he came up with valves turning the opposite direction in each cylindre.
that requires making new links.