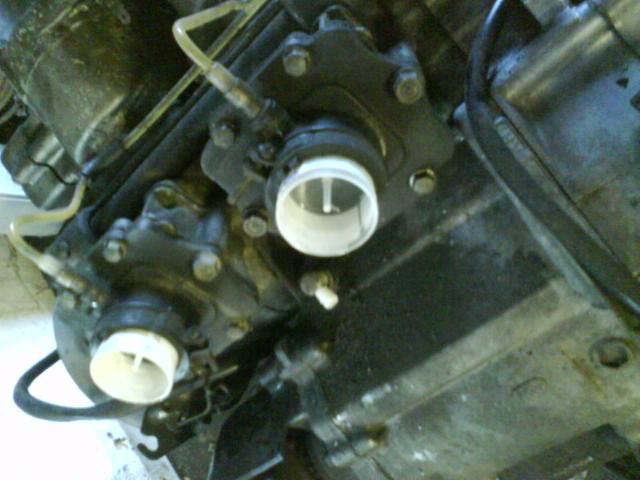
Sorry about the picture quality it was taken on my phone!
Cheers
AL
Next Bottom end by mj43rc46 wrote: Removing the top end.
1. Drain the rad and remove pipes from engine side and then the 3 bolts to remove the rad.
2. Remove the Chambers and cans.
3. remover the Power valve motor and cables (very good time to soak the cables in oil and clean the motor)
4. remove spark plug caps and put them out the way, I marked them but I think I read somewhere it doesn’t matter which way they go as the KR works with a wasted spark??
5. remove the Plugs
6. Undo the 8 nuts holding the top end on, with a wiggle and a small tap with a rubber hammer the top end will break away from the cases. Now lift it off.
7. You can now take the top end away to a bench and work there,
8. Pistons come off by removing one cir - clip and tapping the gudgeon pin through with plastic tube or bit of hard wood will do. It’ll come off it your hand and expose the small end.
Rebuilding the Top end on a Bench Is defiantly the way to go you can see the power valves, make sure the head mates with the barrels, and then sort the linkages without the need to lie down and look up the exhaust port,
Head / Barrel Assemble
Assuming all the bits are ready and in front of you!
1. Lots of 2 stroke oil on power valves, Drop them into the barrels.
2. Place the head gasket DRY over the barrels, (best if the locating dowels are in the barrels its easier to line the head up)
3. Drop the head on taking care not to damage the gasket or power valves, bit of oil on the seals helps them slide through.
4. Loosely drop the 10 head bolts in and screw in by hand.
5. Slowly going form each bolts (half to full turn to start with then as they get tighter a quarter turn) tighten up the ten bolts the head has them numbered. Follow the order.
6. Once they are all fairly tight, give them a quick Tweak. You will torque down later.
7. Place the flat side of the power valve towards the front (exhaust Side), this puts them in the Open (or near as dam it) position.
8. Place the linkage on with the OP lined up against the Marker on the head.
9. I then put some old screws in lose to see if the basic operation worked, moving the pulley from OP to CL and looking in the exhaust port you can see if they line up and if they work. It did!!!! so I took the old screws out and replaced them with NEW Allen head countersunk bolts with a bit of thread lock you can also see at this stage if the power valve opens fully and closes, and make any adjustment needed.
10. With the Barrels and Head assembled I thought about the problem where the Rods sometimes pop’s off the end of the brass nipple... to cure this I bought some small E clips and locked them between the Screw head and Brass nipple, Ta da! A bit shrewd but works, they don’t interfere with operation at all!
11. You should now have your Top end ready to go!!!!!
Barrels onto cases.
1. The piston Kit came with Rings, Cir - clips, Gudgeon Pin, rings and an Oil Ring (think that’s what it’s called). With the Kit I bought the rings could only go on one way, and I was told the Thinner of the 2 (it is obvious) goes on the bottom with oil ring (Oil ring is obviously an option as NONE of the other 10 pistons I have in the garage have it installed).
2. While it was in my hand I installed one of the cir - clips as they are a bit of an arse to pop in. and the rings, use a little oil.
3. I took the small end off, and dunked it in 2 stroke Oil, and replaced it back into the Con Rod.
4. Then placed the piston over the con rod (remember the Ring pins go towards the rear of the engine, towards the bollocks LOL) and lined up the hole, the new gudgeon pin goes in easier than the old ones coming out.
5. Install the other Cir – clip making sure it’s sat well and you’re ready for the assembled top end.
6. The Base gaskets where new and with some advice form MR B and Elf I did a very light covering of Hematite (RED) this apparently helps stop the gasket moving forward when you tighten it up and prevents leaks.
7. MAKE SURE YOUR CASES OR BARRLES HAVE THE LOCATING DOWLS INSTALLED.
8. I covered the pistons and inside of the bores with 2 stroke oil. Moved the crank so that one of the pistons was at TDC lightly squeezed (you can reach through the top of the frame while holding the top end in your other hand) the rings and slowly pushed the barrel over the piston... Ta Da! Done. Then I moved the crank a little so that the joined assemble cam down wards and the other piston came up to meet it, Again squeeze the rings of the second piston and slide the rest of the top end on.
9. Move the top end over the studs and slide it down.
10. I used the slowly slowly method by putting the nuts on finger tight and then working round slowly tightening the nuts, There doesn’t seem to be any order for the Nuts as there is on the head but I did opposite nuts half to quarter turn until it was all fairly tight. Lastly I did a tweak again and again torque these up later.
11. Now that the Top end was back in place I completed the rest By installing the Power valve motor and Rad. While the exhausts are off, switch the ignition on and look up the ports hopefully you’ll see all the valves move to the open position and then back to closed.
12. Replace the exhausts; I used the old gaskets as they where in good shape.
13. Replace the tank and Have a Go..
Hopefully this will be a painless experience and I will try to remember to take pics as I go along, huge thanks to rc and mjmj43 wrote: Here goes the quick version to splitting an engine 15 minutes tops
Remove the clutch cover
pull out the steel pin and alloy centre
Remove the circlip that is underneath that lot.
Pull the clutch drum out plates all come out in one go.
Big washer next line up the splines and take that out. Now pull the clutch outer drum out.
there should be a washer next if it didn't come out with teh drum and behind it a circlip remove that.
Next up the oil feed A shaped bit held in by one small cross head remove that.
Circlip holding the idler gear the one underneath that A shaped bit remove, then washer gear and washer
Spin the motor round.
4 bolts holding gear change cover remove cover.
Pull out gear change shaft.
Undo 10mm bold holding the arm with the wheel that is attached to the spring. Remove bolt spacer arm and spring.
Plate spring went on to remove the bottom bolt do not undo the top bolt.
Now undo the bolts holding the gear box plate can't remember the number includes a couple that were under the gear change cover.
once all bolts are undone gently tap the release locations - little lugs on the cover and the gear box with cover will come out in one piece.
Ok - assume gear box is out
Turn engine over and undo the bolt holding the water pipe.
Turn engine backover.
Clutch side undo the clutch/engine cover. On teh water pump cover only undo the lower rear bolt - that one holds the engine cover on. The other two just hold the water pump cover to the engine cover.
With all the bolts undone carefully remove the cover - it has to come off the water pipe, and the kickstart shaft.
With the cover off remove the kickstart shaft - I pull the pin that the spring is attached to out. Be careful there is a washer behind the kickstart which tends to stick to the cases.
Spin the motor round - remove the flywheel need a puller for that. three allen bolts remove generator. Three cross heads hold the timing cover remove those and the timing cover.
Turn the engine upsidedown.
Balance weight cover remove the 8mm head bolts. Remove the tapered cross head at the front of the cover (KR-1S only). Undo the 4 x 12mm head bolts in a cross pattern a bit at a time just to loosen then completely.
Lift off the balance weight cover - don't loose the two locating pins (haven't mentioned those before there are two on the gear selector cover - in fact two on all covers).
Lift out the balance weight - dont loose the rubber bit at the end. Put somewhere safe. (when putting it back it has two punch marks on teh gear these align with teh same two marks on teh crank gear). Don't loose the two half circle steel locating clips.
Next undo all teh 8mm head bolts holding the crankcase halves together.
Next the 8 x 12mm head bolts - half a turn at a time work around the numbers in reverse order. Repeat twice then undo all teh way.
Split the cases remove teh crank, and locating hal circle thing, and teh gear box bearing and its half circle thing.